Friday, December 30, 2011

2011

I'm always surprised by how fast a year of one's life can fly by.  Never was that more apparent for me than in 2011.  Looking back, I can attest that 2011 was probably one of the best years of my life.  It was a year filled with many, many highs  - and a few lows - which I'm beginning to realize is simply the way I like to live.  Sure, I could eliminate some of the disappointments if I didn't always swing for the fences, but at the same time, I'd never get my shot at the big leagues.

I prefer to accept the lows for what they are - drowned in a bit of whiskey of course!  For years, I've focused on the word Persistence, and it is my firm belief that this quality is the most important in relation to dealing with all of life's affairs.

Nevertheless, I can ultimately admit that this year was a positively huge success - and I am always amazed at what God continues to provide and teach me.  Overall, it seems that when I lose my focus on him and try to force my own plans into action - things always tend to unravel.  It's in the moments when I am completely trusting and working in the right direction that he reveals all of the goodness in the world.   

January was a thrill!  Coming off a nod from The New York Times for writing one of the year's best cookbooks, I was invited to join Kathie Lee and Hoda on the TODAY Show for a romantic cooking segment.  They were hilarious, awesome, and . . . inquisitive!  The segment turned out fantastic, but the most special part was having the support of my family and friends in NYC and everywhere else.  In fact, this was the first time my parents had ever visited the Big Apple, and that was probably my favorite memory of this wonderful experience.  Nothing makes life better than sharing great times with the people you love.
Goofing around with Kathie Lee and Hoda.
I remained pretty busy in February with another trip up to NYC to promote a Valentine's Day segment on Fox & Friends.  Again, another great segment, and I had a special time hanging out with friends Bobby and Rachel in Brooklyn.  After that, it was off to LA for more meetings - and some romance, haha.  I also did my first bout of snowboarding - which may or may not have resulted in a broken rib.  I'll get there - one day.

March - June seems like much of a blur to me now.  After the success of my first book, I decided to sign with a great literary agent and try my hand again at the traditional publishing business.  Well, my timing probably could have been better.  The news of BORDERS closing and the increased popularity of digital readers sort of put most literary houses on hold for the time being.  After spending months working out the details of my proposal, My agent and I worked diligently to find the right home - and we were close, but ultimately we decided to hold off for a bit and let the storm subside.  It was disappointing -  but I know it was also a smart decision.  More on this in 2012!
This keeps me awake while writing book proposals!
In July, I decided it was time to get back out there!  Too much time behind a computer typing away makes Jack a dull boy.  I had the pleasure of spending 10 days in PEI Canada as a chef/musician/guest of the Cavendish Beach Music Festival.  It was just what I needed.  A special thanks to Chris and Kevin Meyer for believing in the 'formula' of having a chef entertainer at a music festival.  Fortunately - it worked!  The festival (and my role) turned out to be a huge success.  Moreover, I was completely taken away with the beauty of PEI and the friendliness of its people.  After months of rejection, it was incredible to be surrounded by such great people in such a wonderful setting.  I honestly cannot wait for next year - and the debut of the 'formula' to more festivals across the country.
The beautiful, rolling landscape of PEI
Serving up hundreds of pounds of local, fresh ingredients.
My partner in crime
August brought about new opportunities in the television world.  Through a Nashville connection, I was put in touch with on of the better known production companies in NYC, and we signed a deal to create, produce, and sell our on TV Show!

September - lots of college football, and another trip up to PEI for the fall flavors festival.  A special thanks to Mark, Ross, George, and Corey for showing me just how much fun PEI can be during the fall.  Oh, and thanks to Charles for capturing pictures our street festival cook off where I showed islanders that charcoal - and local skirt steak  - are king when it comes to building great flavors.
Table side prep w/ Corey.
In the line of fire!
October - hmmm, what did I do in October?  I believe that was a month filled with even more travel.  Greensboro, LA, ATL, Athens, and Playa del Carmen!  I must say, there's nothing better than gorging oneself in Mexico with all of your family when its just starting to turn cold in the states.  It was a fantastic vacation!
Enjoying the good life in Mexico
November - an incredible wedding for a close friend in Savannah, GA, including a reunion show with my guys in OverflO!
Jam session with the talented drummer/sous chef/groom.
Then came disappointment.  A week out from the NYC shoot for the television show, production was suddenly cancelled.  Oh well, it is what it is.  I could sulk, bitch, and moan, but at the end of the day I know that everything will come together in due time.  After a few Woodford + Cokes, I was off to my next adventure - whatever that may be!

Turns out the next adventure came quickly.  A 'side business' created with myself and two friends suddenly hit the big time!  We found ourselves scrambling to fill orders to meet the overwhelming demand of our 'grassroots' fragrance - MOONSHINE; a gentleman's cologne.  Turns out we were right - men like to wear cologne.  But, we don't need a celebrity or a half-naked man to sell it to us.  What a concept? 
MOONSHINE; a gentleman's cologne
And finally, December.  Another fantastic trip out to LA brought about new opportunities for 2012 in the TV and book world.  My long run in my beloved neighborhood of Germantown (Nashville, TN) came to a close with a move to a new hood.  I HATE moving - but change is the only constant in life.  I will now call 12th S. home for a while - so if you see me gaining pounds from eating too much at Burger Up, please let me know.  But most importantly, I ended my year with the way it started - surrounded by family with great food, drinks, and love.

Cheers to you and yours, and wishing you all much success in 2012.

Keep Peaceful!

MM


Wednesday, December 14, 2011

Holiday Dinner


Want to know how to throw the perfect holiday party?  Check out the full series on The Art of Manliness.  

In my opinion, there’s no better way to celebrate the holidays than by hosting a holiday dinner party for a group of your best friends.  Armed with great food, cold drinks, festive tunes, and the sometimes creative costume, spending time with the people you love is what makes the holiday season special.

Yet, for those of you who’ve ever hosted such a bash, you know that a good time doesn’t come for free.  In fact, quite a bit of hard work, planning, and expense can go into hosting such affairs.

This is where I come in.

Throwing an outstanding holiday party can be a piece of cake - so long as you have a game plan.

First things first, I would highly advise you to avoid hosting a party that consists solely of hors d’oeuvres.   From a guest perspective, you tend to come away from such a party never feeling truly satisfied.  Don’t agree with me?  Allow me to jog your memory - You stand around all night, eating cream cheese filled concoctions, cocktail napkin in hand, while you dodge the occasional awkward conversation, wondering if that spinach and artichoke dip that came out 30 minutes ago is ever going to be reheated.  Sound familiar? 

Moreover, hosting such a party can be very expensive and time consuming.  Each appetizer typically contains 10 - 12 unique ingredients - many of which will only sit in your spice rack unused.  And let’s not forget about prepping and serving.  Taking on such a challenge is like trying to serve eight or ten individual meals to your guests.  In other words, it’s just not worth the hassle, or the expense.

Instead, I advocate hosting an actual dinner party.  Your guests will be impressed when you serve an entire meal - all the while saving you time and money by choosing a themed dinner that includes consistent ingredients and a viable prep schedule.

With regards to prep and shopping - do not procrastinate.  Make a list of all the ingredients you’ll need and go shopping the day before, checking off every item on your list.  When you get back home, put away and prep your ingredients, double crossing off your ingredient list to make sure you have everything on hand.  This will allow you to feel confident and not rushed when the big day arrives.  Also, in the rare event that you find that you missed an important ingredient; you still have time to make another run to the store.

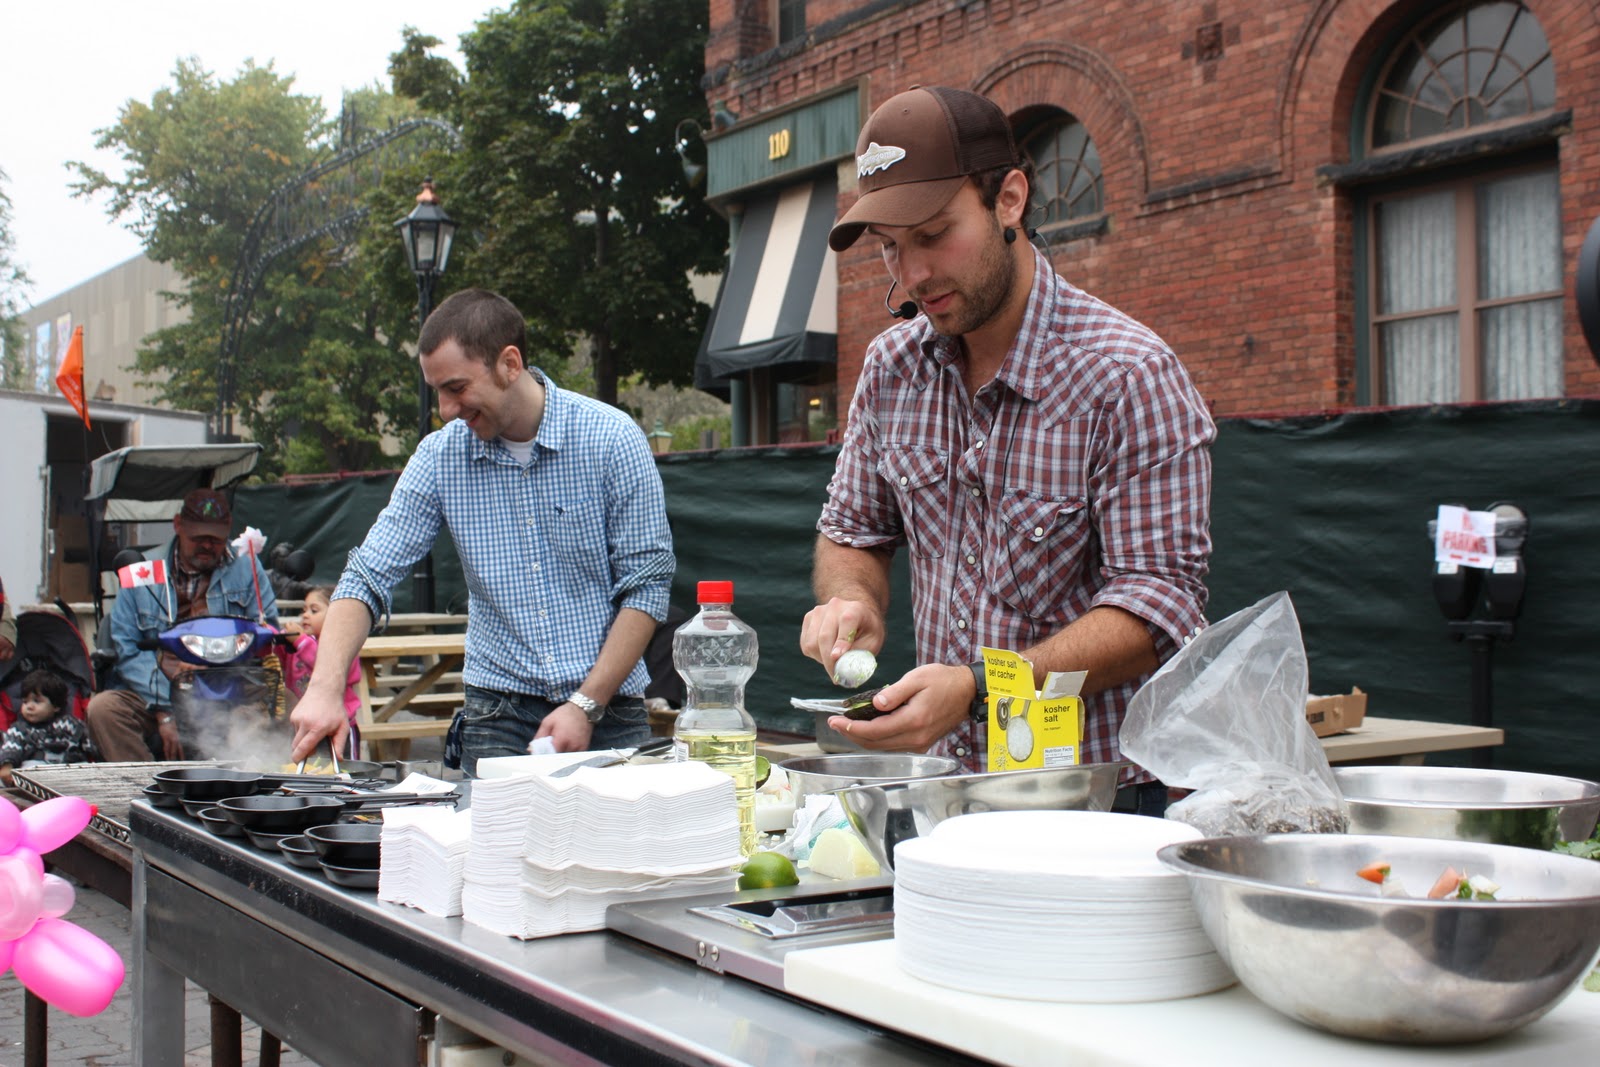
Doing all of your prep work the day before also ensures that you spend your party enjoying the company of your guests.  I’ve learned this lesson the hard way, with many of holiday parties spent solo in my kitchen with a cast iron pan and a whiskey on the rocks.  Trust me, it doesn’t look good to cook and drink alone - nor is it proper etiquette to host a party and not spend time with your guests.

This meal makes use of some other key cooking tips when it comes to entertaining for large groups. 

  • Choose a few items that require little or no cooking.  These types of dishes can typically be served at room temperature, and do not make use of precious kitchen space and tools.  In this case, the antipasti platter works perfectly.  Other options would include a crudite platter, hummus and vegetables, or even a large salad.
  • Items that can be cooked or put together ‘on the fly’ minimize your time in the kitchen.  The Sautéed Shrimp, Sautéed Spinach, and Yogurt and Berry Parfait all satisfy this component.  You can excuse yourself from your guests for mere minutes while these dishes are prepared.
  • For the main course - go with a big hunk of meat.  No, seriously.  In this case, I’ve chosen a Standing Rib Roast, as it’s a classic dish of the season.  For other events - beef and pork tenderloins, whole roasted chickens, pot roasts, or even a leg of lamb make elegant dishes to serve large groups.  You can literally ‘set it and forget it’.
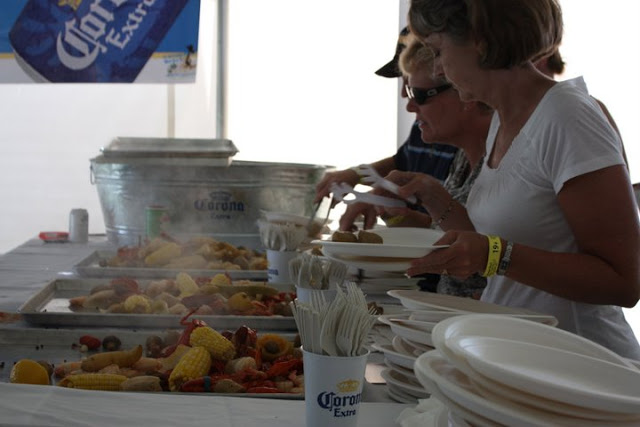
Of course, I’d be amiss to leave out one important element of any holiday party - a well stocked bar.  Cold beer on ice, wine selections, an assortment of liquors, mixers, and perhaps even a signature punch or cocktail are  all special touches to make sure your guests take a load off and enjoy the evening.  As the host it’s part of your job to make sure your guests enjoy themselves responsibly - have a few cabs waiting on standby for those that might imbibe past their normal bedtime.

Most importantly - have fun.  Hosting holiday parties will create great memories for years to come.  And, if you follow my game plan, I can guarantee your parties will become the talk of the town!

Season’s greetings!

MM

APPETIZER COURSE - the Antipasti Platter can be prepped hours in advance and set out prior to your guest’s arrival.  As most 
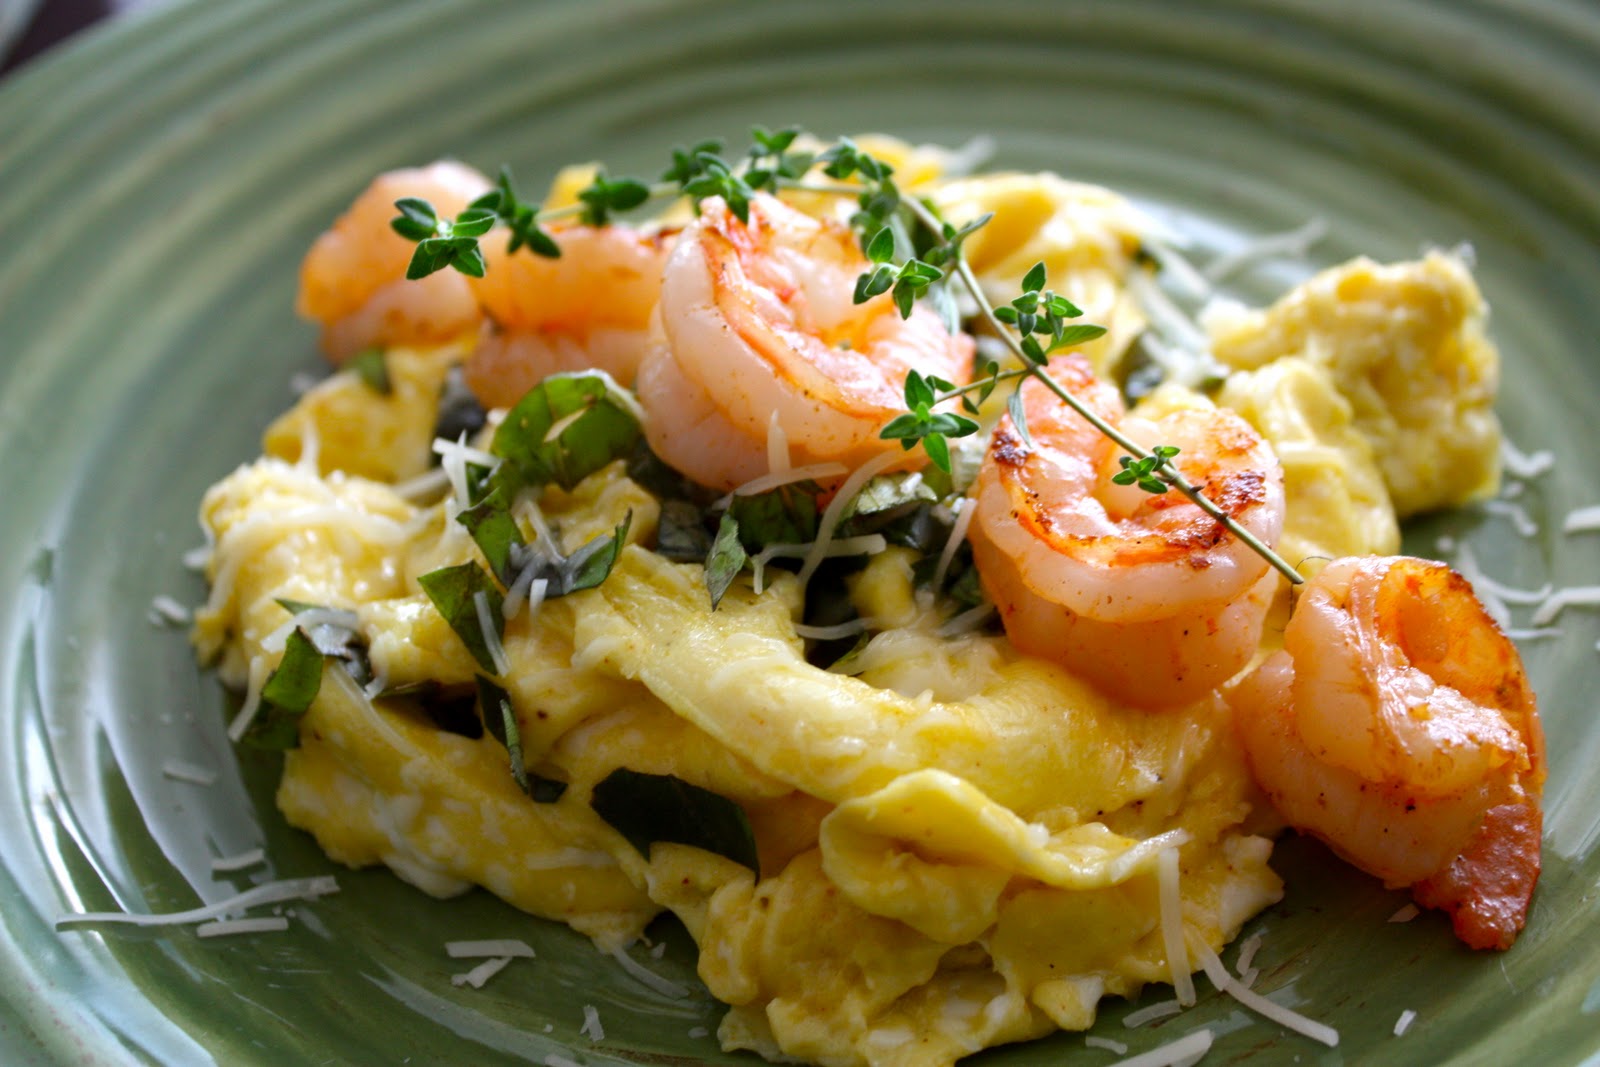
of your guests have arrived, take a few minutes to put together the Sautéed shrimp- the unique ‘out of the pan’ presentation will have your guests feeling like they are getting an á la table chef dining experience

Antipasti Platter - the beauty of this versatile platter is that you can let your imagination run free.  Pick out an assortment of your favorite cheeses, cured meats, vegetables, pickled goods, breads, and crackers to serve to your guests.  To ensure that you can feed the entire group, plan to have about ¼ lb of total goods per guest.  Check out one of my favorite pairings below.  (Prep 20 mins, Cook N/A, Serves 8 - 10)

2 lbs Wisconsin Aged Cheddar Cheese, sliced
1 lb Sopressata or Hard Salami, thinly sliced
1 Loaf French Bread, cubed and toasted
1 lb Marinated Olives

Arrange ingredients on a serving platter.  Serve.  (If prepping in advance, cover platter with plastic wrap and keep in the fridge until 30 minutes prior to service).
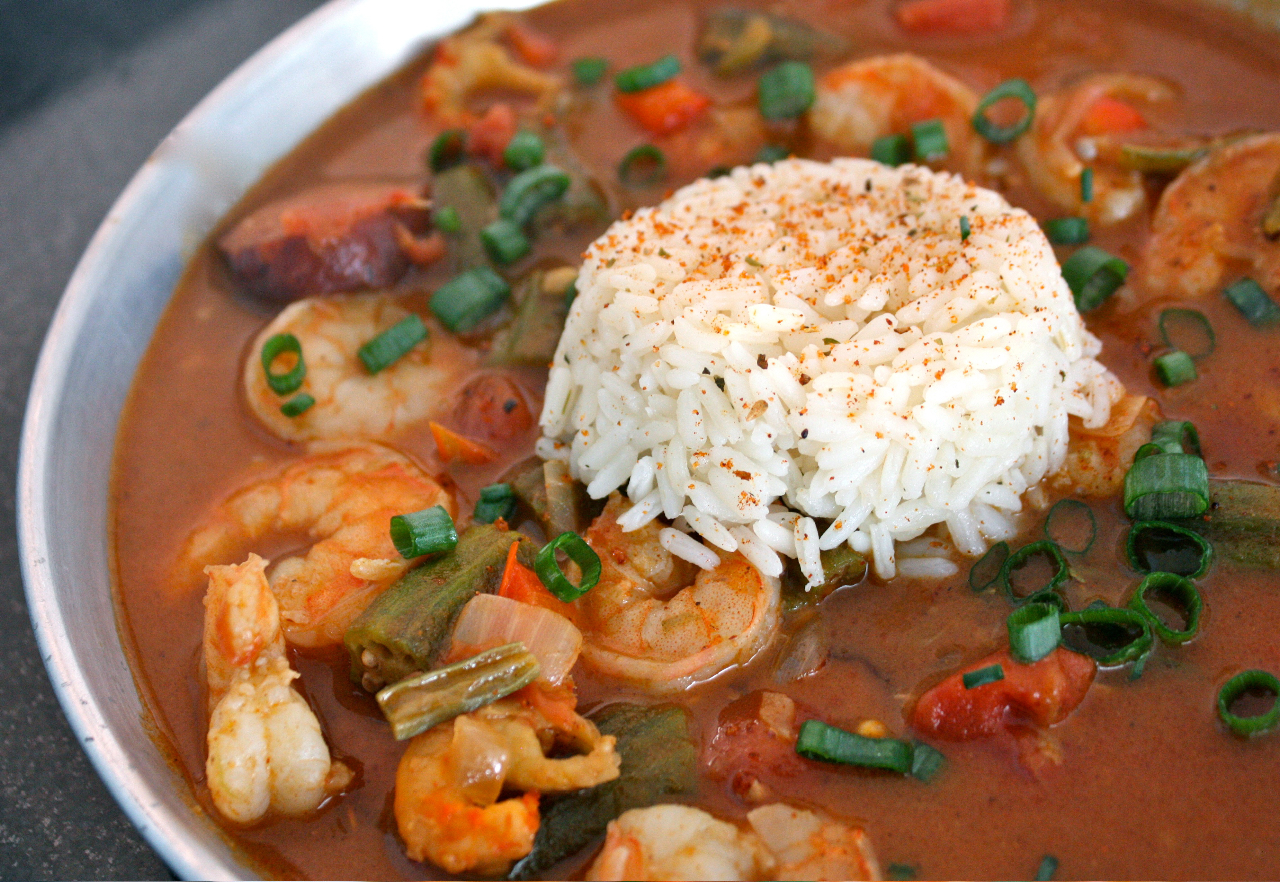
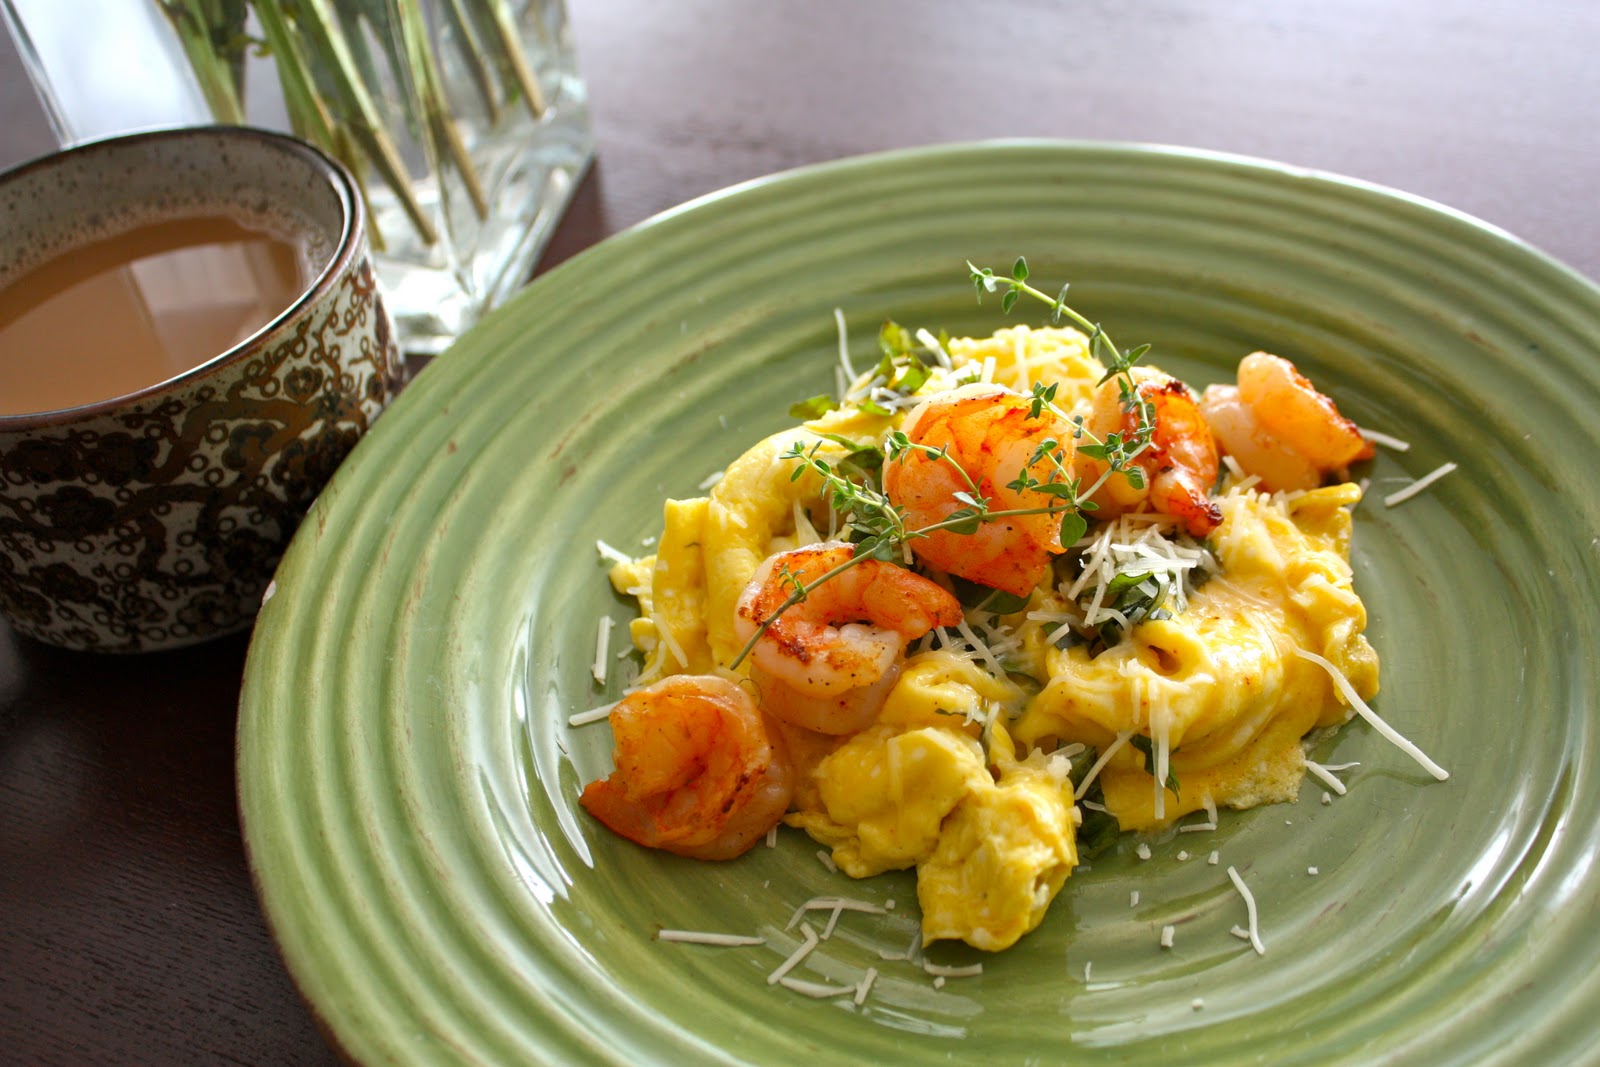
Sautéed Shrimp - a play on the traditional shrimp cocktail, the unique presentation of this dish makes it as much of a dining experience as it is an incredible appetizer.  (Prep 15 mins, Cook 10 mins, Serves 8 - 10)

½ Stick Unsalted Butter
2 Tablespoons Extra Virgin Olive Oil
4 Cloves Garlic, minced
1 Pinch Red Pepper Flakes
1 Tablespoon Lemon Zest
3 lbs Large Shrimp, peeled and deveined
¾ Teaspoon Kosher Salt
½ Cup White Wine
Parsley, chopped for garnish
6 inch Bamboo Skewers - to serve

In a large skillet over medium high heat, melt the butter into the olive oil.  Working very quickly, next add the garlic, red pepper flakes, and lemon zest and sauté in the oil/butter mixture for 30 seconds - careful not to burn.  Add shrimp, season with salt, and cook for 2 - 3 minutes.  Deglaze the pan with the white wine, using a wooden spoon to scrape up any of the bits from the bottom of the pan.  Continue cooking for another 4 - 6 minutes, or until the shrimp are firm and bright pink.  Remove from heat, garnish with parsley, and serve right out of the skillet, using the skewers to pick up individual portions.
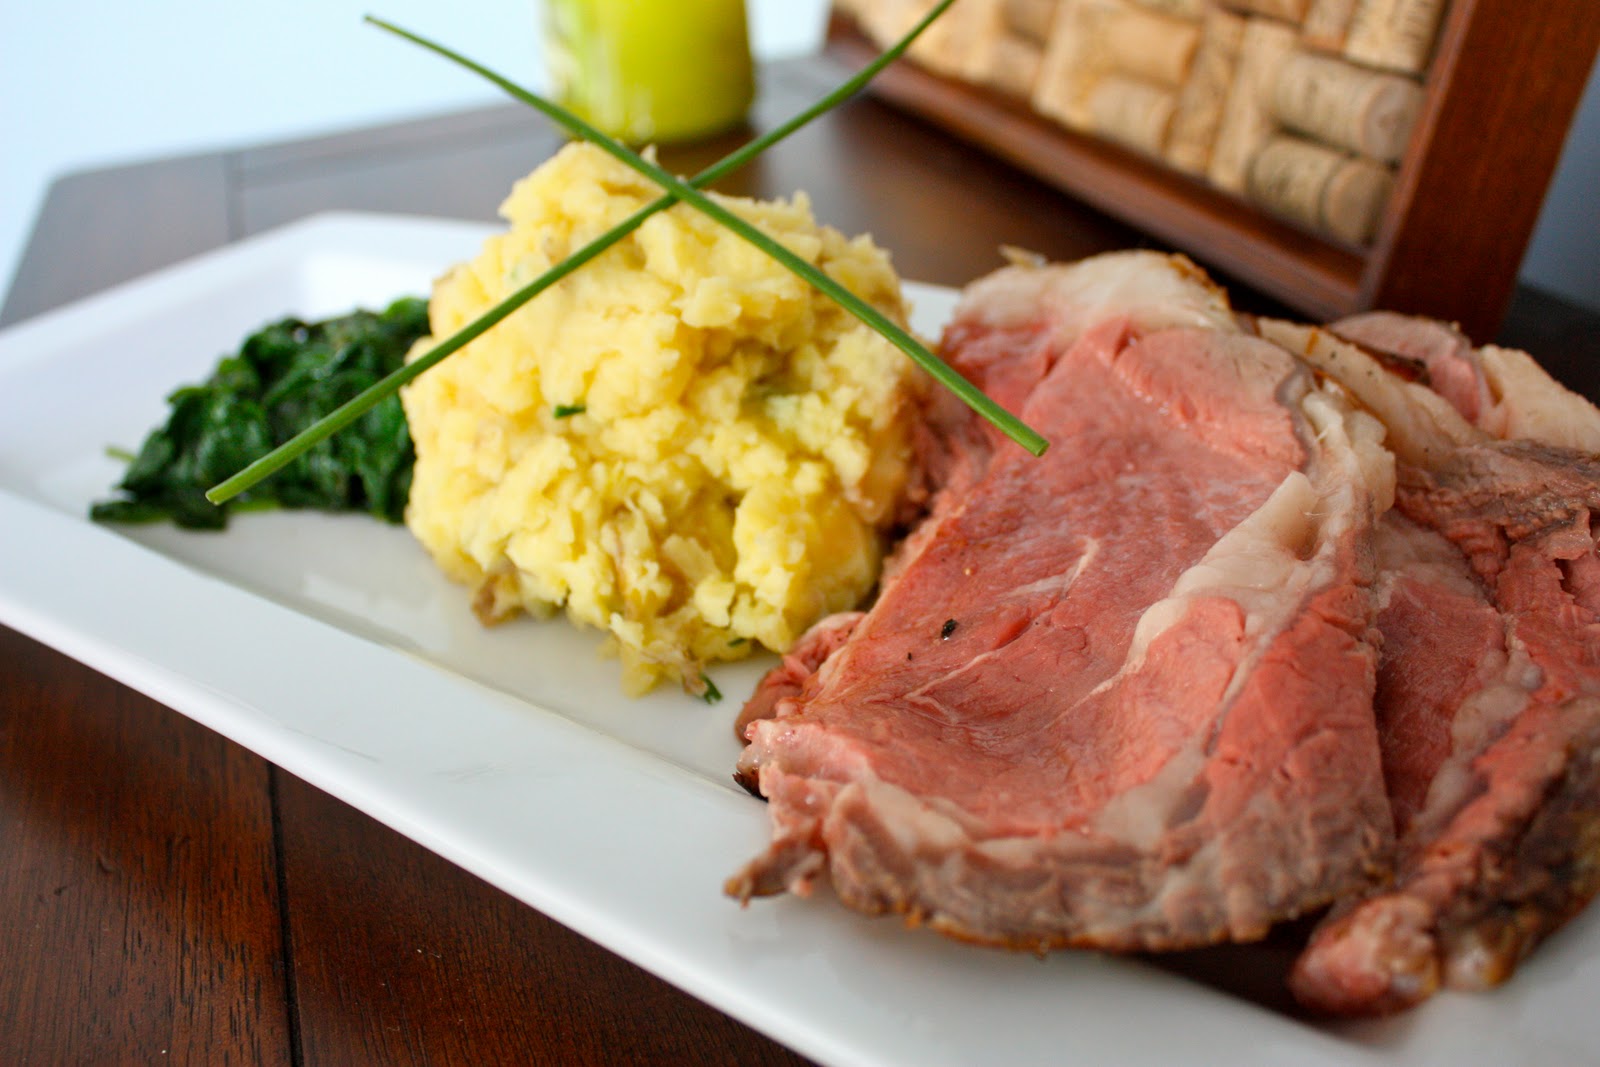
MAIN COURSE - Standing Rib Roast has long been a holiday favorite - and for good reason.  Your guests will love the juicy, flavorful meat - sopping up the juices in garlicky masked potatoes and bright, colorful spinach.  This classic meal will make your holiday party memorable and special.

Standing Rib Roast - a classic, delicious dish that’s perfect for entertaining.  .  (Prep 15 mins, Cook 1.5 hours, Serves 8 - 10).

1 4 -5 lb Rib Roast
¼ Cup Extra Virgin Olive Oil
Kosher Salt
Fresh Cracked Pepper
10 Cloves Garlic


Preheat oven to 375 degrees F.  Meanwhile, place roast - rib side down - into a heavy bottomed skillet and coat in olive oil.  Season entire roast very liberally with kosher salt and fresh cracked pepper and arrange garlic cloves in the bottom of the pan.  Place roast into oven and cook for 1 - ½ hours (about 15 minutes per pound), or until internal temperature reaches 125 degrees for medium rare.  Remove from heat and rest for 20 minutes before serving.

Garlic Mashed Potatoes - utilizing the roasted garlic from the roast adds that extra essence to these divine mashed potatoes.  Go to work on these while the roast is out of the oven and resting - as this will ‘hold’ for up to 30 minutes or so without the need to reheat.  Should you need more time, fold in a little more cream and reheat the potatoes over low heat just before serving.  (Prep 15 mins, Cook 25 mins, Serves 8 - 10).

5 lbs Yukon Gold Potatoes, peeled and diced into 1 inch cubes
2 Sticks Unsalted Butter
1 Cup Heavy Cream
Roasted Garlic Cloves (from Rib Roast), skin removed
Kosher Salt
Fresh Cracked Pepper
2 Tablespoons Chives, finely chopped


Bring a large pot of salted water to a boil over high heat; add potatoes and cook until just fork tender, 10 - 12 minutes.  Remove and strain potatoes, allowing all of the water to evaporate.  Reduce heat to low, and place the empty pot back on the stove and melt the butter into the cream.  Add potatoes, roasted garlic, and season with kosher salt and fresh cracked pepper to taste.  Using a masher or ricer, mash potatoes until desired consistency is reached, adding more cream for a looser consistency.  Garnish with chives and serve immediately.

Sautéed Spinach - a light, quick, and easy side to help round out this fantastic meal.  (Prep 5 mins, Cook 5 mins, Serves 8 - 10).

¼ Cup Extra Virgin Olive Oil
¼ Teaspoon Red Pepper Flakes
4 lbs Fresh Baby Spinach
Kosher Salt
½ Lemon


Preheat a large skillet over medium high heat, add oil.  Add red pepper flakes and sauté for 30 seconds - 1 minute, careful not to brown.  Add spinach and sauté until reduced and tender, 4 - 5 minutes.  Season with kosher salt (to taste), and finish with fresh squeezed lemon juice.  Serve.

DESSERT COURSE - why fuss with baking a cake all day?   Instead, this light and refreshing dessert is served in individual portions - making you look like you spent extra time and attention on each guest - but truth be told, this delicious dessert couldn’t be easier!

Yogurt and Berry Parfait -
satisfy your guests in no time with this simple and beautiful dessert.  Most grocers sell pints of prepared berries which will save time and money when it comes to prepping ingredients.  Wait to add the granola until just before serving.  (Prep 5 mins, Cook N/A, Serves 8 - 10).

5 Cups Low-fat Vanilla Yogurt
2 Pints Mixed Berries (Strawberries, Blueberries, Blackberries, Raspberries)
2 Cups Granola

In individual serving glasses, add a generous layer of vanilla yogurt.  Top with berries and granola.  Serve.

Monday, December 5, 2011

Taco Soup

Whether or not you are disappointed with the BCS decisions, one thing is certain - it was a great weekend for watching football!

I had a few friends over to watch the games, and made an old simple classic - Taco Soup.  

It's one of those recipes that's foolproof, cheap, and delicious.  It pairs perfectly with a Saturday or Sunday of watching football and drinking cold beer.  


Enjoy!

Taco Soup 

2 lbs Ground Chuck
1 Package Original Taco Seasoning Mix
1 1/2 Cups Beef Stock
1 (4oz) Can Diced Green Chilis
1 Can Stewed Tomatoes
1 Can Rotel Tomatoes
1 Can Corn Kernels, drained
1 Can Black Beans, drained and rinsed
1 Can Kidney Beans, drained and rinsed
1 Can Mild Chili Beans
1 (1 oz) Package Ranch Dressing Mix
Shredded Cheese (topping)
Sour Cream (topping)
Sliced Green Onions (topping)

In a dutch oven over medium high heat, brown ground beef until no longer pink.  Drain excess fat, add taco seasoning.  Add the remaining ingredients - except for the toppings - and cook at a simmer over medium low heat for 30 minutes.  Serve.

Oh yeah - serve with COLD BEER!


Saturday, December 3, 2011

Greek Breakfast

It's a beautiful Saturday morning in Nashville.  Thanks to construction across the street, I'm up unusually early - the sound of saws, hammers, and workers screaming at each other just isn't very conducive to sleeping in - oh well.

Last night was a relaxed evening anyways.  I finally got around to seeing Woody Allen's new film, Midnight in Paris - it was underwhelming.  

So I decided to pick things up this morning with a great breakfast.  After strolling down to the Nashville Farmers market, I scored some fresh tomatoes, greek oregano, farm fresh eggs, local feta, and some pork sausage to round out the rest of my Greek inspired meal.  

After brewing a cup of Don Francisco's hazelnut coffee - I went to work.

Slicing the tomatoes - lightly seasoned with kosher salt, fresh cracked pepper, and a drizzle of olive oil - all topped off with some fresh oregano leaves.

After that, I simply seared the sausage in my cast iron pan, scrambled up some eggs - topped with feta - and there you have it - breakfast is served.

Time to hit the gym - and get started on the next course.  Hmm - what to make today to help cheer on the Dawgs vs LSU.  Time will tell.

Later,

MM

Friday, December 2, 2011

Holiday Gift Guide

It's that time of the year again . . .

The kind folks at Southern Flourish magazine asked me to put together the perfect gift guide for the southern man.  I obliged, and included a few of my favorite things, including some of my own stuff and products from friends and others.

Give it a look -

Happy Holidays!

MM

Friday, November 25, 2011

Turkey Leftovers

Head over to The Art of Manliness to check out my post and make your comments on your favorite turkey leftovers!

(Full Text below)


Enough is enough - I’m going on a diet.  

Those are typically the words that come out of my mouth every Friday morning after the Thanksgiving holiday.  Certainly, my actions the day before pretty much always set me up for such a statement.  After a day of overeating and watching football, I tend to feel a bit slower in my step.

But, as in most years, it never fails that I tend to push that diet off to the week ahead.  After all, there are so many leftovers from Thursday’s feast that I’d be a fool to let it all go to waste.  Ah, the power of procrastination.

Yet, the idea of repeating the exact same meal from the day before often loses its luster on my tired taste buds.  So instead, I seek out ways to re-use all of that goodness before I stare down a week of grilled salmon and salad.
In other words, don’t be bored with your meals, or even worse, let great food go to waste!  Entertain your family and friends one more time around with these great ideas for turkey leftovers!

MM

Turkey Rotel - a comforting casserole filled with cheesy carbs, vegetables, and tender turkey.  A great make-ahead dish that can be prepped for dinner later in the day, or simply frozen and used for a meal on a busy weeknight.   (Prep 15 minutes, Cook 45 minutes, Serves 4 - 6)

1 lb Dried Spaghetti
½ Stick Butter
1 Red Bell Pepper, diced
1 Onion, diced
1 Jalapeno, finely diced
1 Cup Frozen Peas
1 lb Velveeta Cheese, chopped
1 Can Cream of Mushroom Soup
1/3 Cup Milk
4 Cups Leftover Turkey, chopped

Preheat oven to 350 degrees F.  Cook spaghetti according to directions on the box, or al dente; 10 - 11 minutes.  Drain pasta and set aside.  Meanwhile, melt butter into a skillet over medium heat.  Add bell pepper, onion, and jalapeno and sauté until tender, 4 - 5 minutes.  Add remaining ingredients, including the cooked pasta, and mix thoroughly until the cheese is just melted and ingredients are well combined.  Add the entire contents of the skillet into a greased casserole dish and bake uncovered for 30 minutes.  Serve.


Turkey and Sausage Gumbo - a delicious and hearty soup that makes use of all of that wonderful leftover turkey, including the white and dark meat.  (Prep 15 minutes, Cook 1 hour, Serves 4 - 6)

¼ Cup All Purpose Flour
¼ Cup Vegetable Oil
1 Onion, finely diced
1 Green Bell Pepper, finely diced
4 Cloves Garlic, finely diced
1 Can Petite Diced Tomatoes
32 oz Turkey (Chicken) Stock
1 16 oz Bag Frozen Okra, cut
1 lb Andouille or Smoked Sausage, sliced
4 Cups Leftover Turkey, chopped
Hot Cooked Rice, to serve


In a Dutch oven over medium heat, slowly cook the flour and oil together, creating a roux about the color of a dull penny; 20 minutes.  Next, add bell pepper and onions and sauté until tender, 4 - 6 minutes.  Add garlic and tomatoes; continue to sauté for another five minutes.  Slowly add the stock and increase the heat to medium high until the mixture begins to simmer.  Add okra, return to a simmer, and cook for another 10 minutes.  Finally, add sausage and turkey and heat through - 10 minutes.  Serve with hot cooked rice.

Smokey Turkey Quesadillas - these tasty bites are perfect for enjoying more football with friends.  Simple, clean, quick and easy - just the way cooking’s supposed to be.  (Prep 10 minutes, Cook 10 Minutes, Serves 4 - 6)

2 Cups Leftover Turkey, chopped
1 Teaspoon Chili Powder
1 Teaspoon Cumin Powder
4 Tablespoons Butter, separated
4 Large Flour Tortillas
4 Cups Pepper-Jack Cheese, grated
Sour Cream and Salsa, to serve

Combine the first three ingredients into a bowl and mix until evenly combined; set aside.  Meanwhile, melt a tablespoon of butter at a time into a non-stick skillet.  When butter has melted, add one tortilla into the pan.  Arrange ½ cup chopped turkey, and 1 cup of cheese onto one side of the tortilla.  Using tongs or a spatula, carefully fold over the other side of the tortilla to cover the ingredients.  Allow the tortilla to cook and slightly brown on one side, flip and repeat on the other side.  Remove from pan, cut into even wedges, and serve with sour cream and salsa.  Repeat process for remaining ingredients.

Turkey Cobb Salad - I like to consider this as somewhat of an ‘indulgent’ salad.  Filled with tasty bits of turkey, crispy bacon, and creamy blue cheese dressing, this is a great way to get started in moving towards the direction of a ‘diet’ - even if it is a bit heavy.  Keep in mind that many of these ingredients can be prepped ahead of time; making this meal more of an ‘assembly’ rather than an actual dish that requires cooking.  (Prep 10 minutes, Cook N/A, Serves 2)

4 Cups Romaine Lettuce, chopped
1 Vine Ripe Tomato, diced
½ Red Onion, finely diced
4 Slices Crispy Cooked Bacon, chopped
2 Hard Boiled Eggs, diced
1 Cup Leftover Turkey, chopped
Blue Cheese Dressing, to serve
Create a bed or even layer of lettuce onto a large plate or serving platter.  Next, top the salad evenly with remaining ingredients.  Serve with blue cheese dressing on the side.

Pesto + Turkey Submarine Sandwich - an upgrade on the traditional turkey sandwich, the pesto adds a sweet and savory flavor that enhances the delicious turkey.  Pile these ingredients high on a loaf of Italian bread, and slice into individual portions to serve your hungry guests.  In a pinch, most grocers offer pre-prepared and jarred pesto to save time.  (Prep 10 minutes, Cook N/A, Serves 4)

Fresh Pesto

2 Cups Fresh Basil Leaves
2 Cloves Garlic, peeled
¼ Cup Pine Nuts or Walnuts, toasted
½ Lemon, juiced
Kosher Salt
Fresh Cracked Pepper
½ Cup Parmesan Cheese, grated

Combine the first five ingredients into a food processor and pulse until evenly chopped.  With the processor running, slowly stream in olive oil until fully incorporated and smooth; season with salt and pepper.  Add cheese, and pulse until combined.  (Keeps in the fridge up to 3 days)

Turkey Submarine Sandwich

1 Large Loaf Italian Bread
Fresh Pesto
Mayonnaise
1 lb Leftover Turkey, sliced
Iceberg Lettuce, sliced
Vine Ripe Tomatoes, sliced
Yellow Onion, thinly sliced
Extra Virgin Olive Oil
Red Wine Vinegar


Using a bread knife, carefully slice the loaf of bread in half, creating a top and bottom side.  Smear the bottom side with pesto sauce, and add a layer of mayonnaise to the top side.  Begin layering sandwich starting with the turkey, lettuce, tomato, and onion.  Drizzle with extra virgin olive oil and splash with vinegar.  Place top side of bread on top of sandwich and slice into individual servings.  Serve.


Sunday, November 20, 2011

Pan Roasted Chicken Breast with Roasted Tomatoes and White Beans

After a long weekend on the road, this was the perfect, no fuss, one-skillet dinner to wind down on a Sunday.  Some big news to hit tomorrow, so I'm off to bed early to tackle the day with all I got.
Enjoy!
MM
Pan Roasted Chicken Breast with Roasted Tomatoes and White Beans - this rustic, Italian inspired dish evokes all of the flavors of comfort food without the guilt. Utilizing a bone-in chicken breast adds flavor and keeps the chicken moist. We create a nice crispy skin on the outside of the chicken by pan searing the breast, skin side down, on the stovetop. After that, the flavors meld together while finishing off and roasting in the oven. This dish pairs well with a crisp Pilsner (Beer) or dry Chardonnay/Sauvignon Blanc (Wine).
2 Tablespoons Extra Virgin Olive Oil
1 8 oz Bone-in Chicken Breast, skin on
Kosher Salt
Fresh Cracked Pepper
Italian Herb Seasoning Blend
1 Cup Cherry Tomatoes
4 Cloves Garlic, peeled
1 Cup Canned Great Northern/Navy/White Beans, drained
Preheat oven to 425 degrees F. On the stove top, preheat skillet over medium high heat; add oil and heat until oil shimmers in the pan and just begins to smoke. Add chicken breast, skin side down, and sear (do not touch) for 3 minutes. Flip chicken breast, and add cherry tomatoes and garlic cloves to pan. Season the entire dish lightly with kosher salt, fresh cracked pepper, and Italian herb seasoning. Add the skillet to the oven and roast, 18 - 22 minutes, internal temperature should be 160 degrees F. With 5 minutes remaining, add beans to skillet with the tomatoes, stir and add back into the oven to heat through. Remove skillet from oven and plate, discarding garlic cloves. Serve.

Tuesday, November 8, 2011

Seafood Gumbo

There's just something about the Fall season that puts me in a New Orleans state of mind.  I suppose it has something to do with the Cajun style of cooking that seems to satisfy my cravings for comfort food.  Regardless of the reason, I can attest that a day of cooking Seafood Gumbo is a day well spent.

For me, it typically tends to happen on a Saturday or Sunday.  Once I get the urge, I head down to Little's Fish Company and pick up a mess of the best seafood I can find - shrimp, crawfish, crab, fish, etc.  That's what I like about Seafood Gumbo - the thick roux and base is simply just a carrier for whatever seafood you can find.  It's rustic, real, and delicious.

Keep in mind that a big pot of gumbo is meant to be shared.  I enjoy inviting 10 - 15 of my closest friends over for a day of watching football, drinking beer, and eating this delicious creole creation. 

Of course, I should come clean that everyone has their own 'style' when it comes to making this dish.  Mine is a melange of many different versions and experiences, ranging from my New Orleans friend's 95 year old grandma, to a simple quick shrimp gumbo that's been in my family for years.  Regardless of your method, one thing is certain - it's ALL about the roux.

Creating a dark, thick roux takes time and patience.  In fact, as the roux begins to darken and caramelize, the chances of burning the roux (and ruining the dish) increase each minute.  For that reason, I like to have all of my ingredients prepped and ready to go.  After that, I stand by my pot for 45 minutes, cold beer(s) in hand, and make sure that I get this most crucial element just right.  After that - it's simply just a matter of 'stirring and dumping' to complete the rest of the meal. 


Seafood Gumbo  

1 lb Andouille Sausage, cut crosswise into ¼ inch thick slices
3 Cups Okra, cut into ½ inch slices
1 Cup Vegetable Oil/Butter/Shortening
1  Cup Flour
1 Large Onion, finely diced
1 Large Bell Pepper, finely diced
2 Celery Stalks, finely diced
1 Tablespoon Creole Seasoning
1 14.5 oz Can Petite Diced Tomatoes
10 Cups Seafood Stock

1 lb Lump Crab Meat
1 lb Medium Shrimp, peeled and deveined
1 lb Crawfish Tail Meat
Hot Cooked Rice
Scallions, sliced

Preheat a Dutch oven over medium heat. Add sausage and cook until browned; remove and set aside on a plate. Next, add okra and sauté until just tender, about 3 - 4 minutes; remove and set aside on a plate. Combine oil and flour, stirring constantly, to make a dark brown roux, about the color of chocolate; 30 - 35 minutes. Add the onions, peppers, celery, and seasoning; sauté until tender, about 8 - 10 minutes. Add tomatoes, followed by the seafood stock and bring to a boil. Reduce heat to low, cover and simmer for 30 minutes. Add sausage and okra back into the pot, cover and simmer for 10 - 15 minutes, or until okra is just cooked through. Add the crab meat, shrimp, and crawfish; stir to make sure the seafood is immersed in the liquid. Turn off heat, cover, and allow the seafood to gently cook for 10 - 15 minutes. Shrimp and crawfish tail meat should be firm and bright in color. Serve in bowls topped with white rice and garnished with sliced scallions.

Tuesday, November 1, 2011

MOONSHINE for sale!

With Have Her Over for Dinner, I helped teach guys that simple, affordable, and impressive cooking was realistic at home -  even for the every day guy.  Now, you can smell great while doing it! 

After a year of development, I'm happy to announce the launch of MOONSHINE; a gentleman's cologne.  Manufactured in Grass, FR and hand crafted right here in the USA - the scent is masculine - woodsy - with notes of black pepper, tobacco, gin, leather, and patchouli.  A lighter aroma that's not overwhelming, yet still memorable.  As we like to say, Repeal Her Prohibitions.

A perfect gift for any man - check it out at www.moonshineformen.com

Ok, headed back into the kitchen!

MM

Monday, October 31, 2011

Making Better Eggs

My post on making better eggs debuted last week on The Art of Manliness - quite frankly, it was one of my most popular posts ever - guess there is a lot of interest out there surrounding the world of breakfast - no matter what those publishers say in NYC!  It's got me thinking . . . Enjoy!

________________________________________________________

In my opinion, eggs are one of your best resources in the morning.  Full of quality protein, virtually carb-free, and packed with vitamins and minerals, they make the ultimate breakfast food.  Don’t be too swayed by the cholesterol scares of the 1980s; eating the whole egg-not just the whites-has actually been shown to have anti-inflammatory properties and to improve good cholesterol levels. Eggs are a fantastic food for men who are looking to get in shape; they help build your muscles, and they keep you satiated for a long time. A study showed that men who ate eggs instead of carb-rich bagels for breakfast consumed less calories over the course of the day.

And besides their great nutritional profile, eggs are easy to prepare, taste great, and are dirt cheap (less than 15 cents per egg!).

Yet, for all of their greatness and simplicity, I know a lot of guys who mess up even a basic scrambled egg. Their eggs are edible, but not incredible. Since we’ve been focusing our efforts on getting back to the basics in the kitchen, I wanted to share my thoughts and techniques on getting the most out of this versatile food.

Here are tips on preparing eggs in four of the basic, traditional ways: scrambled, fried, poached, and hard-boiled. We’ll cover the wondrous omelet in a separate post.

Let’s get cracking.

Scrambled Eggs

In my opinion, there are two schools of thought when it comes to the perfect scrambled egg.  Low and Slow vs. Hot and Fast.  Whatever your preference, the two methods typically turn out two very unique types of scrambles.  Low and slow yields eggs with small curds that are moist and soft, whereas the hot and fast method turns out eggs with larger, denser curds.  Instead of taking sides, I’m laying out both options.

Non-stick cookware truly comes in handy when scrambling eggs.  The slick non-stick surface allows for easy cleanup, and preparation containing less fat or oil.  Make sure you always use a wooden spoon or rubber spatula on the cookware to prevent damaging the non-stick coating.

One of the more important elements to the perfect scrambled egg, regardless of the method, is air.  That’s right, air.  The more air you can whisk into the mixture, the more full and fluffy your scrambled eggs will turn out.  It’s important to whisk your eggs in a large bowl, using a circular motion that pulls the eggs to the surface, rather than stirring around the perimeter of the bowl.  Utilize a tilted wheel motion with either a fork or whisk to get as much air into the eggs as possible.  With that said, you do not want to overbeat your eggs.  You will know when your eggs are ready when the mixture is evenly colored and frothy.

Many people like to add salt, pepper, cream, and herbs to their eggs prior to scrambling.  I prefer to wait to season the eggs until they have finished cooking.  Regarding cream or herbs, you can utilize these ingredients to enhance moisture and flavor, but they are not necessary.  A properly scrambled egg will not need any additional ingredients to taste excellent.

Scrambled Eggs

1 Tablespoon Unsalted Butter
3 Large Eggs
Kosher Salt
Fresh Cracked Pepper

Low and Slow- Heat an 8 or 10 inch non-stick pan over medium low heat, add butter.  Meanwhile, crack eggs into a bowl and vigorously whisk until combined and frothy.  When butter is completely melted, add eggs to pan.  Wait to stir until eggs have just begun to set.  Using a wooden spoon, begin to push the eggs towards the center while tilting the pan.  This will create small curds and allow the runny portions to reach the hot surface.  Continue in this manner until there is no longer any runny portion remaining.  Remove eggs from heat, season with salt and pepper to taste, and serve.

Hot and Fast - Heat an 8 or 10 inch non-stick pan over medium high heat, add butter.  Meanwhile, crack eggs into a bowl and vigorously whisk until combined and frothy.  When butter is completely melted, add eggs to pan.  Wait to stir until eggs have set in the pan, the runny portion should remain on top of the cooked portion.  Quickly use a wooden spoon to scramble and lift off the cooked portions while allowing the uncooked eggs to reach the heat.  Do not over scramble. When there is no longer any runny portion that remains, remove eggs from heat, season with salt and pepper to taste, and serve.

Fried Eggs

Unfortunately, most people typically have a negative connotation with fried eggs.  Perhaps it’s the word “fried” in the description.  Keep in mind, a fried egg is much different than the caloric disaster of chili cheese fries down at the Starlight Diner.  Honestly, fried eggs, when prepared correctly, hold very little of the oil or fat used to prepare them.

On mornings when I’m rushing out the door, my go-to breakfast is a few fried eggs.  I can cook the eggs quickly, and I don’t have to pull out, or clean up, several bowls or utensils.

Butter is traditionally used in the preparation of fried eggs; however, I prefer using olive oil instead.  The health benefits of olive oil are abundant, but I also like the distinctive flavor it adds.  Also, because extra virgin olive oil has a higher smoke point than butter, I find that my pans clean up easier when using oil instead of butter.

Fried Eggs

1 Tablespoon Extra Virgin Olive Oil
2 Large Eggs
Kosher Salt
Fresh Cracked Pepper


Heat an 8 or 10 inch non-stick pan over medium heat, add oil.  Carefully crack eggs into the pan, allowing room for each egg to cook separately.  After a minute or so, the egg white will solidify from transparency into a firm white texture.

At this point, you have a few options.

For sunny-side up eggs, continue to cook for another minute until the white portion is firm and just cooked through.  Carefully slide eggs onto a plate, season with kosher salt and fresh cracked pepper to taste, and serve.

For a firmer yolk (over easy, over medium, over well), place a lid over the pan and cook (steam) the yolk for another few minutes until the egg is cooked to your desired consistency.  You can gently use your finger to press on the yolk to determine doneness.  An over-easy yolk will give to slight pressure, whereas an over-medium yolk will be firm to the touch.  Remove lid, season eggs with kosher salt and fresh cracked pepper to taste, and serve.

Another option is to remove the pan from the heat, and using a quick tilted back-and-forth motion with the pan, flip the egg onto its other side.  Of course, a spatula may also be used to flip the egg.  Return the pan to the heat and continue to cook until the yolk is cooked to your desired consistency.  Remove from heat, season with kosher salt and fresh cracked pepper, and serve.

Poached Eggs

Novice cooks typically shudder in fear at the idea of poaching an egg.  Truth be told, it takes some skill to get this technique down.  But, with a little practice and a few tips, you will be able to impress your guests in no time.

Poaching is one of the healthier methods for preparing eggs.  Because the eggs are cooked while immersed in water, there is no need to add extra oil or butter.  A word of caution: it typically takes a bit more time to prepare poached eggs, which may not make for convenient preparation on a busy weekday.

When poaching, it’s important to find the freshest eggs possible.  Ideally, eggs should be no more than a week old.  Remember, fresh eggs lack oxygen, are heavy in weight, and the white will gather completely around the yolk, making a rounder, neater shape.
Adding a tablespoon of white wine vinegar to the simmering water will help the egg hold its shape.  Simply placing the poached egg in a bowl of water will remove any of the vinegar taste after cooking.  I also find that placing the egg on a piece of bread after cooking is a great way to get rid of any excess water.

When entertaining a large crowd, you can poach a batch of eggs in advance, and immerse and hold the eggs in ice water until ready for service.  Before serving, return the eggs to simmering water to heat through.

Poached Eggs

1 Tablespoon White Wine Vinegar
2 Large Eggs
Kosher Salt
Fresh Cracked Pepper

Fill a 12 inch stainless skillet or a large pot with at least three inches of water.  Bring water to a boil over high heat.  When water comes to a boil, reduce heat to low, add vinegar, and allow water to remain at a very slow simmer.  Break eggs into separate small containers.  Next, carefully slip eggs into the simmering water.  If necessary, using a spoon, gently nudge the egg whites closer to the yolk.  Allow eggs to slowly simmer for 3 - 5 minutes, depending on yolk preference.  Carefully remove eggs using a slotted spoon or spatula and immerse in water to remove any vinegar, if desired.  Season eggs with kosher salt and fresh cracked pepper, serve.

Hard-Boiled Eggs

Hard-boiled eggs are a handy “on the go” breakfast staple.  Eating a few hard-boiled eggs in the morning is a convenient way to get your metabolism started without facing a crash later in the day.  The best part about this cooking method is that it creates eggs that you can store for several days to use in salads, sandwiches, or simply as a quick snack.  A touch of kosher salt and fresh cracked pepper can really enhance the flavor of a simple hard-boiled egg.

Several manufacturers now sell hard-boiled eggs alongside fresh eggs at the store.  For a premium, they offer the convenience of precooked and peeled eggs.  If you don’t have the time to prepare hard-boiled eggs on your own, this is a great time saver.

However, if you want to save a few bucks, these are really quite simple to prepare at home.  My best advice after cooking the eggs is to allow them to come back up to room temperature before peeling.  You will encounter trouble if you try to peel the eggs while they are either too hot or cold.  Store your hard-boiled eggs in an airtight container and refrigerate, keeping up to 3 - 5 days.

Hard-Boiled Eggs

6 Large Eggs
Place eggs into a large pot or skillet and cover with water by one inch.  Over medium high heat, bring water to a slow boil and allow eggs to simmer for 1 minute.  Remove from heat, cover, and allow the eggs to sit for 10 - 12 minutes.  Carefully transfer eggs into a colander and rinse under cold running water until they are no longer warm to the touch.  Allow the eggs to sit at room temperature for 15 - 20 minutes before peeling.  Serve immediately or store in an airtight container and keep refrigerated for later use.

Thursday, October 20, 2011

Cast Iron Cooking


For those who read my blog on a regular basis, you know two things are almost inevitably certain with everyone of my posts - 1) I'm enjoying a cocktail while cooking.  2)  I'm cooking with Cast Iron.

Cast Iron cookware is my favorite type of cooking equipment on the market - it's heavy duty, lasts a lifetime, cheap, versatile, and it also keeps you healthy by supplying a low-dose of iron to your diet along the way.  What's not to love?

It gets better.  Lodge Cast Iron has always been a great partner of mine - sending cookware for festivals, tv appearances, etc - all over the country.  It's nice to arrive in NYC with a big box of great Lodge cookware waiting for me - Mark and the team at Lodge are the best.

So I was so happy to see their latest endeavor - The new Lodge Seasoned Steel (pictured) - it's super light weight, yet still has the same great cooking performance of traditional cast iron.  Trust me - I get a workout lifting those heavy pans - so it's nice to have a lighter option that works great for travel, home, or even TV!

For those of you unfamiliar with the cooking/cleaning process for cast iron, I've taken this directly from Lodge's website - check it out, and order your cookware today!

Best,

MM

Using Your Lodge Cast Iron
 
Rinse with hot water (do not use soap), and dry thoroughly.

Before cooking, apply vegetable oil to the cooking surface of your pan and pre-heat the pan slowly (always start on low heat, increasing the temperature slowly).

Once the utensil is properly pre-heated, you are ready to cook. 

TIP: Avoid cooking very cold food in the pan, as this can promote sticking. 

PLEASE REMEMBER: Handles will become very hot in the oven, and on the stovetop. Always use an oven mitt to prevent burns when removing pans from oven or stovetop.


Cleaning your Lodge Cast Iron

After cooking, clean utensil with a stiff nylon brush and hot water. Using soap is not recommended, and harsh detergents should never be used. (Avoid putting a hot utensil into cold water. Thermal shock can occur causing the metal to warp or crack). 

TIP: If you are having trouble removing stuck-on food, boil some water in your pan for a few minutes to loosen residue, making it easier to remove.

Towel dry immediately and apply a light coating of oil to the utensil while it is still warm. 

TIP: Do not let your cast iron air dry, as this can promote rust.

Store in a cool, dry place. If you have a cover, or lid, for your utensil, place a folded paper towel in between lid and utensil allowing air to circulate. This prevents moisture from collecting inside the utensil, which can cause rust.

TIP: The oven is a great place to store your cast iron; just remember to remove it before turning on the oven.

NEVER wash in dishwasher.

If for some reason your utensil develops a metallic smell or taste, or perhaps rust spots (maybe a well-meaning relative washed your utensil in the dishwasher or with soap thinking they were being helpful), never fear. Simply scour off the rust using a very fine grade of sandpaper or steel wool and refer to our section Re-seasoning Your Lodge Cookware.

IMPORTANT PRODUCT NOTE: If you have a Lodge Grid Iron or Pro Grid Iron Griddle, make sure to place it over two burners, allowing the griddle to heat evenly and avoid a stress break or warping. It is also a good to preheat the griddle in the oven before placing over burners on top of stove.


Re-Seasoning your Lodge Cast Iron

While maintaining the seasoning (as in Step 5 above) should keep your Cast Iron in good condition, at some point you may need to repeat the seasoning process. If food sticks to the surface, or you notice a dull, gray color, repeat the seasoning process:
Wash the cookware with hot, soapy water and a stiff brush. (It is okay to use soap this time because you are preparing to re-season the cookware). 

Rinse and dry completely.

Apply a thin, even coating of MELTED solid vegetable shortening (or cooking oil of your choice) to the cookware (inside and out).

Place aluminum foil on the bottom rack of the oven to catch any dripping.

Set oven temperature to 350 - 400 degrees F.

Place cookware upside down on the top rack of the oven.

Bake the cookware for at least one hour. After the hour, turn the oven off and let the cookware cool in the oven.

Store the cookware uncovered, in a dry place when cooled.

For any questions on the use and care of Lodge Seasoned Cast Iron, e-mail lodgemfginfo@gmail.com, or call our Customer Service Department at 423-837-7181

Saturday, October 15, 2011

Gameday


Today UGA plays Vandy in Nashville.

I woke up at 9 a.m., knocked out a 10 mi run on the river, and now I'm sitting here writing to you before I take off for a day of tailgating and drinking beer.  It's sunny, cool, the leaves are changing . . . and I'm in a great mood - life is good.

Of course, life is even better when you start your day off with a breakfast like this.

Not too much writing today for me - but I will say that I've got some new projects in the works that I'm super excited about.  I've been keeping my nose to the grindstone as of late, well - sorta . . . but today I'm gonna go cheer on my Dawgs, drink beer, and dance with women.

All the best,

MM

Parmesan Basil Scramble + Cajun Shrimp

1 Tablespoon Extra Virgin Olive Oil
1/2 lb Large Shrimp, peeled and deveined
1 Teaspoon Cajun Seasoning
4 Eggs, beaten
1 Tablespoon Fresh Basil, chopped
1 Tablespoon Parmigiano Reggianno Cheese, grated

Add oil to a non-stick skillet over medium high heat.  Add shrimp, season with Cajun seasoning, and saute until pink and firm, 2 - 3 minutes.  Remove from pan and set aside on a plate; keep warm.  Add eggs, waiting for one minute to allow them to set in the pan.  Using a wooden spoon, carefully lift the cooked portions off the pan, tilting the pan to allow the runny portion to reach the heat.  Scramble for another 1 - 2 minutes, or until eggs are still moist and firm.  As you finish, add chopped basil and remove from heat.  Plate eggs, top with cheese, and top with a generous serving of shrimp.  Serve.